I hope you guys will be able to follow along with us on this YouTube Layout Hop! A bunch of great videos to inspire you to use your stash and create a layout of your favorite travel/vacation photos :)
Here is my YT video along with some close ups :)
Here is the list of the videos/ YouTube channels that are participating this month:
Don't forget to comment on each video for the chance to win a prize from our sponsor, www.flyingunicornstore.com . Also, be sure to join the Facebook group- Youtube Layout Hop if you are interested in participating :)
I'm on a roll here ;) Another card I made using Mama Elephant Stamps. Love. their. stamps!
The balloons stamped out so nicely using the Memento Luxe inks and the Brilliance ink in galaxy gold.
Love the sentiment stamps and banner die from Simon Says Stamps.
Here's the process video:
Here's a close up photo:
Hope this inspires you to make something creative!
Just thought I'd pop in and share a card I made for my nephew. He was named, "Rookie of the Year" of his track team :) Yay! So of course I had to send him a congratulations card. I looked through my massive stamp stash looking for a sneaker or track related stamp and found the stamp from MME- Boy Crazy. Not really a running sneaker but yes, a sneaker will do. Hope you guys like the clean and simple card :)
I am so excited to be participating in this month's YouTube Layout Hop :) I've been busy working on a process video of a layout I did for the hop. So excited about this that I'll post a sneak pic ;) Can you guess what the this month's theme is??
For those of you who haven't heard of the YouTube Layout Hop, it's a group of fun scrapbookers (about 10) who do YT videos each month on layouts based on a chosen theme. Sam & Zoe are the founders. They have a Facebook group where you can join and then sign up for whichever month (or all the months ;) ) you have time to participate. Each month they have a generous sponsor who donates a giveaway. All you have to do to enter in the giveaway is to watch each video in the hop, comment, and your name will be placed in a drawing. How fun is that?
This month, the hop will take place on June 29th, 2014. Be sure to stop by on my YT channel and follow the awesome line-up of ladies :) Be sure to check out the Facebook group as well- here.
I just found out that Paper Smooches is having a call for a guest designer for July and thought I'd give it a try :) you never know, right? I absolutely adore their super fun images, sentiments and adorable fonts. Here are some cards I created this past winter before I started blogging :)
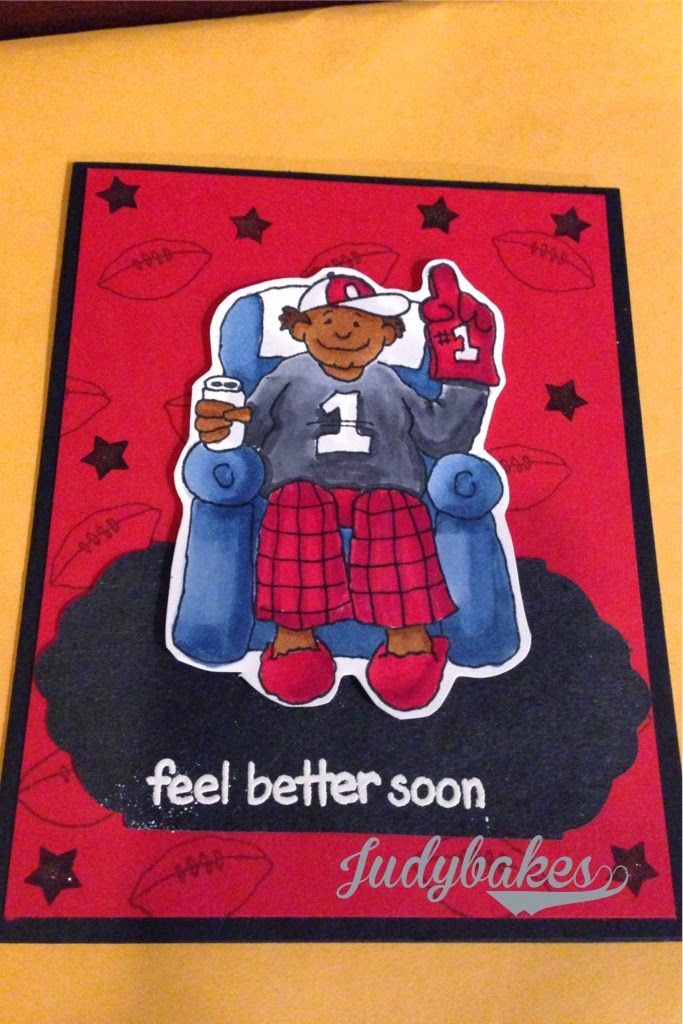
Just popping in to share a card I made for my husband's co-worker. Wow. My husband asked ME to make a card ( and justify my crafty spending?). Uh oh.. pressure is on. How do I represent my {expensive} crafty hobby in just one card?
Honestly, I love making cards because you can make it personal. My husband said he often talks to his co-worker about sports and is a huge Atlanta Falcons fan. Ideas were filling my head. Hmm get well card for a sports fan? I remembered that I had purchased a stamp a while back and now was the perfect time to finally use it ( I knew it would come in handy one day..).
Here is the process video:
Here is the finished card:
Let me know what you think!
I hope I have inspired one of you to create something today :)
I know it's been a while since I posted on my blog. "Life" has taken over again. So I've been making memories more than documenting them these days- which is definitely a good thing. If you don't make memories, then how can you document them, right?
So what have I been up to lately? We celebrated Aiden's 4th birthday at the end of last month, and the following week we headed to New York City :) Super fun! My husband and I grew up in New York so it was nice to head back to see family and of course hit all the restaurants and eat all the yummy foods we've been craving.
I finally had a chance to print out my photos and do some pocket page style scrapbooking about our trip. Since I had so many photos, I used a lot of collage style photos and all I really needed was some embellishments.
Most of you know that I LOVE STAMPS. I use stamps for cards AND I love to use stamps on my layouts, especially my pocket style layouts. The pocket style has individual cards so it's like making a mini card for each pocket. So what better way to embellish than with stamps??
For my layout, I am using Create Indie Stamps. I responded to their Contributor Call and was chosen! Yipee! Since I already own most of their stamps and truly enjoy using them, I was delighted to be chosen to showcase them. I used a few of their stamps sets: Recipe, Flair it Up & City. They were all so appropriate for all my foodie and city shots. I inked them up with the Memento dew drop in Danube Blue and they all stamped out beautifully.
Be sure to snatch up the Flair it Up stamp set because it is now on sale and about to retire :(
My nephew's birthday is coming up so I made a card for him :) Birthday cards make up the majority of the cards that I make and send out. For me, masculine cards are difficult for me to create followed by teen cards. My nephew is turning 12!! Wow. So no more of those cutesy cards, huh? Well, it's hard not to make a cutesy card with funny puns. Anyway, I tried to keep it simple as always and cute but not too cute…
I can't believe 4 years ago, at 2:20am my water broke and a few hours later, Aiden came into my world. He has given me joy and he is my world. We celebrated his birthday on Saturday with his friends at the play gym. He had a Cars theme. So for his birthday, I wanted to make a Cars/ Lightning McQueen birthday card.
So… I dusted off my Imagine and I reluctantly dug out the Cars cartridge. For those of you that have these Disney theme carts know what I mean. They usually have so many intricate cuts and are such a pain to piece together. Honestly, in hindsight, I should have just printed off something from the computer and fussy cut it. Or printed an image off and colored it with my copics.
My Imagine was off calibration so I had to re-calibrate it after I already cut the image..ugh. Then the red I chose was more of an orange color so I decided to just use red card stock. It took me way longer than I had time for.
This is how it turned out:
I had to go in and color in spots where cuts were off. I also chose not to cut the itty bitty pieces and decided to use my copics instead. Not my best work at all. I chose to cut it at 4.5 which is pretty large but that's the only way I can deal with the small pieces.
What are your tips for cutting out these detailed intricate cuts?? I'd love to know :)
Thanks for stopping by!!
Recently, I shared a post showing a pillow box I made for a graduation gift holder. Pillow boxes are a great way to package up a gift. You can insert a gift card, or smaller items like jewelry wrapped in tissue paper. You can even fill it up with candy (my favorite gift-yum!). They are great for that last minute gift where you don't have time to go out and find a box or gift bag. All you need is pretty paper (which all scrapbooker/crafters have), tape and the WRMK pillow box punch board.
I've had my punch board for a while but it's been sitting in my room waiting to be used. The board itself comes with a bone folder and 2 built in punches. The instructions are printed on the board itself. I was surprised at how easy it was.
Here are the step by step photo instructions:
1. First you decide what size box you'd like & what paper you want to use. I used a 6x6 sheet of paper.
2. Line up the left edge of the paper on the line on the middle of the board.
3. Press down on the green oval button (it is a punch) to punch a notch.
4. Use the bone folder to score along the top curve and down the right edge.
5. Repeat to the end of the sheet of paper.
6. Flip the paper over to the underside and repeat with punch, score.
7. Then flip the board to the other side to punch the 1/2 circle notches.
8. Cut from the edge to the score line at a slight angle.
9. Crease at the score lines.
10. Adhere strong adhesive to one edge to connect the two sides/edges.
11. Push the notched ends in.
12. Pillow box is ready to fill with goodies :)
Here is my video of using the punch board for the first time:
It took me a total of 7:27 minutes to make the pillow box from start to finish in real time! Amazing. Not too shabby for the first time and for reading instructions and picking out the paper.
RECAP Pros: easy to use, instructions on the board itself, good punch, good bone folder, light weight, can make pillow boxes in different sizes, punch can be used for other purposes (punching notches or curves) Cons: as with any tool or punch, you need to line it up correctly and precisely. Recommendations: use a light to medium weight paper to be able to "fluff" the pillow box up better. Stiffer papers will be harder to fluff out.
Thanks for stopping by and being inspired :)
Hugs,
Judy
Today I actually baked something crafty ;) I jumped on the bandwagon and baked up some DIY enamel dots. Enamel dots are one of my favorite embellishments to use. They are small yet add such a nice effect on your project. They add dimension, color and shine to an otherwise dull project. They are great to use on a project that has "something missing" or to fill in that "empty spot". I use them on my cards in bunches of threes near sentiments and on layouts to add a little pop of color. They are the perfect size for project life.
Here are some examples where I've added them to my projects:
So here's my recipe:
preheat oven to 400 degrees
line your baking sheet with parchment paper
place your beads (I used pony beads but perler beads can also be used) standing up
bake in oven for 10 minutes.
done.
Yes. It's that simple.
Pony beads come in mini size as well. They will look like this:
The regular sized beads come out like this:
I prefer the smaller mini size ones but either way they both look absolutely yummy! Look how pretty the colors are. Look at the beautiful glossy shine. Lovely.
Enamel dots regularly cost anywhere between $2 to $5 for a package of 40. My pony beads came in a tub of 3200 for the price of $4.95! You do the math. Amazing. I think I am addicted.
But Beware: there was a slight odor to the pony beads. I do not know if there are any harmful chemicals or vapors being emitted. I do recommend that you are in a well ventilated area - either keep the windows open or fan on or better yet, do both. I believe the perler beads are meant for melting. I did not have any perler beads on hand but if I do eventually buy some, I will try and do a comparison.
For my 2nd project as guest designer for Sister Stamps, I used the adorable Graduation stamp. How cute is this grad all covered up in congratulatory leis :)
I decided to create a pillow box using the WeRMemory Keepers punch board and decorated it with the Graduation stamp. Isn't it a great way to enclose a gift - jewelry or a gift card to your special graduate?
I have a process video of the copic coloring here:
I will have a separate video of how I used my WRMK punch board to create the pillow box.
RECIPE
STAMPS:
sister stamps (main image) - graduation
creative time for me (sentiment
COPICS:
skin: E000, E53
hair: C3, C5, C7
graduation cap & gown: B39, B24
diploma: C1
tassel: R29
lei: YR12, YR18
balloon: YR12, YR18
INKS:
memento- (images) tuxedo black
CARDSTOCK:
Neena's solar white
OTHER:
WRMK pillow box punch board
Here are some still photos of the finished project:
Be sure to check out the Design Team's creations!!
I am so excited and honored to be the Guest Designer for Sister Stamps this month!! I was thrilled when Jenny asked me to be her next Guest Designer :) woo hoo! {happy dance}.
I absolutely adore all their stamps. I have been a fan for a while now. They are made from excellent quality, red rubber and are already mounted. All you need to do is peel the white paper backing and place them on an acrylic block and you are all set. You can also trim them so the edges don't catch extra ink- I was too excited to play with them that I didn't even bother trimming them :) Honestly, if you know you will be fussy cutting the image anyway, there's really no need to trim the stamp (in my opinion).
This month's release includes two beautiful images- Wedding & Graduate. Perfect timing for all those spring and summer weddings, and graduations. I absolutely love the Wedding image.
I love weddings and one quote that comes to mind is, "and two shall become one". So when I was thinking about what to create using the Wedding image, I immediately thought of creating a gate fold card. This would be perfect to convey the feeling of two people joining together to become one.
I started by using an 8-1/2" x 11" sheet of card stock and trimming it to 5" x10". This will create a square card at 5". Rather than scoring the card stock in half, you score 2.5" from either end of the card stock. When you fold on the score lines, the edges should meet in the middle.
Here is the video of my card process:
Here is the final card:
RECIPE:
STAMPS:
sister stamps (main image) - wedding
sweet stamp shop (cherry blossoms)
fiskars (sentiments)
COPICS:
skin: E000, E53
hair: C3, C5, C7, B39, 0 colorless blender
wedding dress: (shadows) C1
groom's suit: C3, C5, C7, YR23
bride's head piece: YG23, RV23
cherry blossoms: R20, RV23
INKS:
memento- (images) tuxedo black, rich cocoa
stampin'up- (sky) bashful blue
versafine black (sentiment)
CARDSTOCK:
MFT (base)- cherry
Neena's solar white
As a fun aside, here's a a few photos after our wedding ceremony of my husband & I in Central Park, NYC. I can't believe it will be 12 years in May!!
Some of our favorite pics from our Wedding banquet:
Thanks for watching!!
Be sure to check out the Design Team's creations!!
Hope everyone is enjoying their spring break! I am so far behind in sharing my PL pages. I am also playing catch up with March's pages. I'm usually about 1 month behind which isn't too bad to get caught up when given a few hours. How do I do it?
The main factor in staying caught up is making sure you have the photos. I usually take photos almost everyday. At night, I like to use the pic frame app to edit my photos to format (2) 3x4's onto a 4x6. I either print them out at home, or upload them to the Costco app for 1 hour photo developing for at most .13 per print.
Once I get the photos developed or printed, I place them in the pocket pages, making sure I have spots for journalling- either on the photos themselves or on journalling cards. Whenever I get a few moments- 15 minutes here and there, I will pull out cards from a core kit or PL kit club and start inserting them in the pockets. If it is a special occasion or holiday, I turn to my seasons or holiday kits. You don't want to miss out on using those specific event cards. If it is a new month, be sure to include cards specific to that month.
Have another 15 minutes-1/2 hour to kill? Then I whip out my alpha stickers and start titling my cards or putting subtitles on photos. Or start adding embellishments or stamping that is specific to the photos- ie. food, travel, sentiments.
My final step is adding the journalling. I like to use my own handwriting but if I have more to journal or if I'm quoting a song or phrase, I will use my typewriter. If after all the journalling I find 'empty' spots, then I go to my washi collection or enamel dots to fill in the gaps.
Of course, if I am way way behind, I do it as simple as possible and make most of my photos in the 4x6 format and on the 3x4 spots I journal or use filler cards. The true Becky Higgins way to K.I.S.S ;)
Here are some of my pages from February ;)
Hope this helps in learning more about my process of getting caught up with PL.
Thanks for stopping by and getting inspired!
xoxo,
Judy